(Here's the official link where I got the How To)
First, what you need:
A couple of yards of your desired fabric (I strongly suggest cotton, it holds best. I also threw some tulle in there)
Scissors
A circle template (I used a small dish)
Spray Starch
An iron and ironing board
Hot glue gun
Needle and thread
Your favorite button for the center
A barrette or comb for backing
(Whew!)
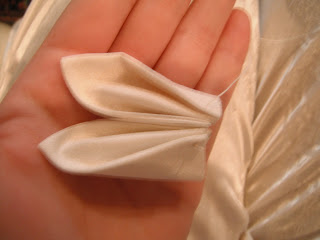
Here we go! First, using the small circle template, trace eight (for a smaller flower) to twelve (for a large flower) circles onto your fabric and cut them out.
Next, using your handy-dandy Spray Starch, starch those puppies at about six inches distance from the fabric! Let that sit for at least a half an hour (it helps to have an episode of Say Yes to the Dress at the ready).
 |
| Starched and ready to go! |
 |
| Folded/Ironed |
 |
| Yes, I am wearing pajama bottoms at 1:00 in the afternoon and crafting on my couch, what of it? |
Repeat that step until all of the petals are completed and threaded together on the same string. At this point, you are ready to tie off the flower. Pull the two end strings together tightly and you should have the shape of your flower. Tie them off, and pull the extra thread through the petals so that it is on the "front" side of the flower. Use the extra thread to attach the button by looping it through the holes or bottom and pull down so it sort of seals the flower together as its center.
Now, to complete the flower! Your thread should now be coming out of the "back" of the flower after the button is pulled down. You can now knot it off and trim the extra. Next, take some of the fabric you used to make the petals and cut out some center-of-your-flower sized circles (I had no idea what to used for a template so I just kind of eye-balled it). I cut out four circles. Then, if you so desireth, cut out some petal-sized circles in your tulle fabric. Hot glue the circles to the back of the flower (they should be slightly wider in diameter the the hole in the flower) and add the tulle between the layers of center circles.
To attach the barrette, cut one final small strip of petal-fabric and hot glue to the barrette.
(To attach to a comb, stitch the final flower once the center circles are glued together to that piece of fabric, pulling tightly). And...
 |
| TA-DAH!!! |
 |
| Yuck, the one on the right isn't looking so hot. That's what I get for using silk instead of cotton. |
Best,
Micah


Those are so pretty!
ReplyDeleteThank you!
ReplyDelete