6.27.2012

Sweet Surprise!

So, the sweetest thing ever (almost literally) happened at work today. The entire staff was having a 'Before-Summer-Staff-Lunch luncheon, you know, like ya do when at the end of the meal, when we had just concluded the business part of the discussion, my boss called Bridesmaid Abbie (yes, I am ridiculously lucky and have a job working with one of my awesome Bridesmaids!) and our friend Ali over. They made a small speech about how we are looking forward not only to the upcoming business but to someone's upcoming wedding!

Someone?!? That's me!

BM Abbie, Me and Ali!
I immediately blushed as they gave to me a card and a beautiful crown (yes, you read that correctly, CROWN) of flowers! I felt immediately giddy, nervous, overwhelmed with happiness and gratitude, and joy at the thought of wearing a crown of flowers for the rest of the day. But then...ohhhhh then...they brought out the cupcakes, from Georgetown Cupcakes on Newbury St. (Yep, the girls from DC cupcakes opened up shop in Beantown!) Because Abbie knows me so well and is AWESOME, she got all different flavors and cut them into smaller bits to share so we all could try a bit of each!

Lavender Earl Grey Tea Cake (my favorite!)
Lemon Berry with a tiny Bride and Groom!
Yum! 

 The whole staff signed a beautiful card and got Patrick and I a gift certificate to one of our favorite restaurants! The flower garland was incredibly beautiful, and made me smell like roses for the rest of the day! Every meeting I had, my colleagues would look at me and smile, and I'd smile back (it was contagious!) 


Rose garland!
I feel so very lucky to work with such giving and kind people, whom I can honestly call my friends. In these last couple of weeks before the big day, I sometimes let myself get bogged down with the stress of last minute projects and things I am feeling behind on. This small, sweet celebration was a brightener and an up lifter and an excitement and joy inducer! And I am incredibly grateful for it. 

Patrick is too, I saved him a cupcake! ;) And yes. I wore the crown for the rest of the day and on the public transportation ride home. 

 Best,

Micah

Bridal Blingies

Ugh. I am SO BAD! I haven't been a good blogger in about a month! I am terribly sorry. The excuse again is that it's TWO weeks away from the wedding and I am running around all over the place with last minute planning, projects, etc. But, I now promise to update as much as I can in the weeks (2!!!) leading up to our big day. As much as I can. :)

So, remember that time I said I was all set with accessories? I had my shoes, jewelry, everything right? Wrong. I changed shoes twice after the initial purchase. Twice! And all in the final three months before the wedding! Sheesh.
Welp. I did it again. Not with shoes! Don't worry. Too much. With earrings.

Skee-daddle, P!
I recently enjoyed the wedding of two really great friends of mine and Patrick's. It was such a beautiful, emotion-filled day! And of course, (because she always does) the bride was stunning! I was particularly obsessed with intrigued by her lovely earrings. She had square shinies that were absolutely gorgeous, and absolutely unpredictable.

Gorgeous, yes? I know! (The ladies are both beautimious bridesmaids of mine, too!)
I had gotten used to the drop, circular, crystal look on Brides ever since I subscribed to the magazine of that same name. Beautiful pieces, yes, but I was seeing them EVERYWHERE! And, well, Katie inspired me to look outside of the norm. (NOT at all saying that drop, circlular crystal bridal earrings are not good, I was just not really into mine any more). Not only that but, when I first bought them, my mom had been a little iffy about them, so back to etsy I went.

Here are my first pair...
Gorgeous, yes. But do they go with my dress?
I don't know...
So, in searching for better earrings, I knew that there were three specific aesthetic choices I'd made about what I wanted that I'd adhere to...

  1. They would be post earrings. Not dangling. If I were ever to conceivably wear my wedding earrings again for a nice event, I don't think they'd actually be worn if they were giant dangly duds. So, posts or studs all the way!
  2. They would be an irregular shape, or to be more general: not round. I decided that the round or oval look really didn't match my dress/overall bridal look.
  3. They would have a vintage element to them.
So there I was, at work, searching desperately for more earrings and guys...it really wasn't hard. I had about six pairs in my cart on etsy before I began to narrow them down. They ranged from art-deco looking beautiful rhinestone pieces, to odd square CZ sparklies. And I got it down to three pairs, then two, and then the choice was clear...


Check out my blingies!

Those lovelies are the winners that I will be wearing on our big day. They came in the mail the other day and I am seriously in love. So much so that I can't wait for those perfect little detail shots starring these beauties. I love that they are different shaped stones and that they kind of look like they belong in the 40's or the 30's even. I think they compliment the style of my dress more and they will be something I can put on at a fancy anniversary dinner or something like that. I can't wait! There are 17 days left!

Brief side note: I was thinking the other day: Why am I changing all my accessories so close to the wedding? How picky can I be? Am I wishy-washy? But looking back, I bought the accessories (shoes, earrings) really early in the process. I was so eager to have them in my possession that I bought them without thinking. Without letting myself picture the day wearing them, letting the image really come to life in my overall plan, and because of that -- I ended up not liking them, and searching for replacements. I am happy (at last) with what I have now, but it would have been better not to have to return the items and/or sell them. My advice: get your accessories for your wedding after you have purchased your dress and after you really *know* (i.e. spent some time thinking about your bridal look) that they fit your vision.

Did anyone else out there change their minds about their bridal look a few weeks away from their big day?

-Micah

6.21.2012

Love Banner


A month or so ago, my FMIL gave me some gorgeous bits of vintage-y, colorful fabric and some burlap. Now, I was never really on the 'Burlap-Wedding' train, but I do love pictures like this...

So even though we are three weeks away from the big day, I sat down one night, and got crafty! Using a cut out from a cardboard box, I drew a pennant flag to be my template.


Then, I traced and cut out each pennant: I did one flag per letter, but I've seen gorgeous ones with one word per flag. It depends on the word or phrase. Mine was "Love."


I hot glued the pretty vintage-y fabric (smaller) flags to the larger burlap ones. And then because I still have SO MANY extra Save-the-Date cards, I decided to re-enforce the flags with us from the photo.


I used a bright blue marker to draw the letters. I only recommend using marker and not fabric paint if you are ok with the letters having a fuzzy glow. I ended up liking the softness, but for a crisper letter, I'd stick witht the paint.

Fuzzy letter 'L'
Glue them onto the string and TA-DAH! Burlap banner with vintage loveliness! I think I will have it hang over the door way to go outside of the Towers, or perhaps along the stairway, right as you are about to enter the main hall.

Now that we are getting so close, I am anxious to see how all of these DIY projects I have been working on will come together! Last weekend, our close friends got married and it was so dreamy! To see all the hard work and planning finally come together; the dress, the music, the decor, the CAKE, the flowers! It was amazing. It really made me think though, how is ours going to come together? Will all the crazy things I made look goofy? What will it be like seeing everything in it's place? Who knows? We have three weeks left. AHH! Let's find out!

-Micah

6.12.2012

Pomanders


Hello friends! I know I have promised to show off this DIY project, I had been working on for what seems like DECADES, but I wanted to have it completely finished before revealing it to the world:

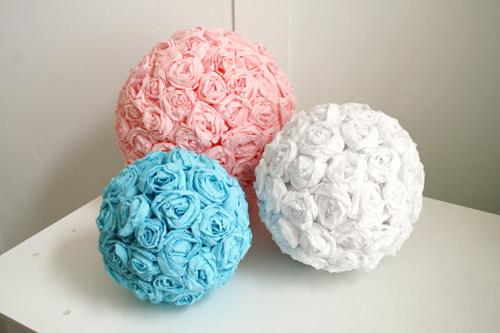
My Blue Rosette Ribbon Flower Pomanders!

Ta-Dah!

Now, how/why did I do this? Well, you know when you think "Flower Girl," you tend to think of this...

Sweet little petal tosses

But then I saw this picture:


And I needed to make them. Somehow, some way.

But, I knew what with all my other crazy planning/numerous DIY projects I wanted to make, that I didn't want them to serve as decor really. So BAM! The idea of having my flower girls carry them down the aisle instead of tossing petals was born! (Also, this would be a plus - not having to sweep up the petals after I slip and fall from stepping on them after the ceremony (since our venue is the same for ceremony/reception)).

Anyway here's the how to:

You will need: Lengths of ribbon, Felt squares, Hot Glue/Gun, a Styrofoam sphere, thin ribbon, beads (optional).

First, I decided on the size of each flower and used a circle template (mine was the outer rim of an old jam jar), and traced the circle into the felt squares. After cutting the squares out, take your ribbon, fold it in half, then put a hot glue bead in the center of the felt circle. Place the tip of the folded ribbon on the glue bead to secure it to the felt circle (careful - SUPER HOT!). Next, you will wrap/twist the ribbon around itself, securing with hot glue as you twist it out to the size of your liking (I did about a bead of hot glue per inch). When you've reached the outside of the circle, snip the ribbon and glue it to the underside of the felt circle. My apologies, I totally forgot to take pictures of this whole process, BAD BLOGGER! Next time I make them, (and I will --- you'll see ::sneaky wink::), I'll try to document the process better.

After adding some center beads, it will look a little something like this:

Blue Ribbon Rosette!
Lastly, if you are making the pomander, you simple squeeze a TON of hot glue on the back of the rosette and stick them to the Styrofoam ball.


Remember to add the hanging device (small string/thin ribbon) BEFORE you finish glueing all the rosettes to the Styrofoam. That way, there will be a clean loop to hang them from or for your cute little flower girls to tote them down the aisle!

It was a lot of work. I must have made about 150 rosettes before both pomanders were done. Needless to say, my fingers were quite happy when I finished the last pomander the other day. What do you think guys? This is the second GIANT DIY I decided to take on. Are there any projects of yours that you knew would be time consuming but went ahead anyway?

All this for one inspiration picture. Jeeze. Haha!

-Micah

6.11.2012

(Seriously) OMG. Shoes.


Let me apologize for my lack of frequent/constant posting lately. I have been under the weather, running around EVERY. SINGLE. WEEKEND. And since our wedding is about four {AHH!} weeks away, Patrick and I are burning the candles at both ends - so to speak.

Anyway, so --- remember when I bought shoes, then got antsy about the color and bought the same pair in a different color, while realizing it still wasn't the right color? Well. Guys, I got antsy again...


If you can recall, way back when I first started to blog about our wedding, I had two shoe posts from just browsing the webs. Well, neither of those shoes had come to pass, because I waited to have the decision of the dress before I wanted to get the pair of shoes; and to my sadness and dismay, when I went to purchase either of the two pair I liked, they were SOLD OUT. I was devastated. But quickly moved on to the Ninas of the last posts.

Like I said, I got the first pair in Navy blue, because for some reason (even though the wedding was still eleven months away) I felt I needed to have the shoes NOW! Then, in April, I realized that I was not OK with the color not being perfect, so I went back online and found the same shoe in a brighter blue. (Stupid online pictures) --- it STILL wasn't the blue I wanted, but it would do. For a month. And a half. (Don't judge!). And I thought I was set. I had returned the first pair, and everything was fine and dandy. Until the other day at work. I kept browsing beautiful pictures of brides with bright blue shoes ---ahem, I mean I was working hard! ---, and I realized that the color bothered me still, and I'd have to go back to square one.

Google search: royal blue shoes. And lo, and behold: the pair of MeToos! that I had been lusting over were once again available! And not only that but they were selling for more than 50% off the original price. I didn't even hesitate. I immediately ordered them and they came in last week and...

PERFECT!
They are the perfect, PERFECT royal blue I had been dreaming of, they fit and they are comfy!


Clearly, I am a woman obsessed with royal blue. Now, don't get me wrong, I am NOT a four shoe bride (although I am quite impressed with the ladies that are). I am returning the second pair of Ninas, and will stick with my MeToos and of course, the wedding TOMS! (What? I didn't share those? Ah! I'll talk to you later about those).

Side by side comparison. DEFINTELY more
royal blue on the right!

Fit perfectly! Ooh! And those cute little round blue thingies
in the background will be getting their own post very soon!

Whew! What a journey with shoes. I think I am finally satisfied. Haha!

How about you brides out there --- did you have an epic shoe journey? Were you as picky about the exact color as I was?

Best,

Micah