Showing posts with label Obsessions. Show all posts

9.24.2014

Wedding Cupcakes - {Anniversary #2 Edition!}

I interrupt these recaps to bring you...a CUPCAKE recipe!

As you know, I have had a long, torrid affair with cupcakes. I'll not deny it. It's all over this blog! Well, our cupcakes were amazing! Beautifully crafted by Patticakes bakery, they were as delicious as they looked...


In addition to those beauts, P and I wanted to have a small cake to cut, like a top tier that we could use for a cake cutting and of course freeze and nom on for our one year anniversary! My grandmother made ours with an amazing recipe she used to make her own daughter's (my aunts) wedding cake. It was DELICIOUS! And even one year later, (my SUPER-preggo self was gleeful to have it) it was so tasty. We enjoyed it our wedding night and our first anniversary celebration. Check it.


(I guess this is turning into a cake/cupcake recap!)

Anyway. Deliciousness for days! We were so happy with the cupcakes and so in love with my grandmother's recipe. Since we only saved enough from the original cake for our first anniversary (also, I don't think two years would be healthy or even edible for saving a wedding cake in the freezer), I asked my grandmother for the recipe - here it is folks! The BEST wedding cake recipe, ever.

Wedding Cake Recipe 

(OK well, I made cupcakes - I cut the recipe in half for the cupcakes. I will include the full cake (which makes two 10 inch pans) in parenthesis next to my measurements)

Cupcakes -You will need..
2 1/8 cups flour (4 1/4 cups)
1 1/2 cups sugar (3 cups)
3 tablespoons baking powder (6 tablespoons)
1 teaspoon salt (2 teaspoons)
1 cup of milk (2 cups)
3/4 cups of Crisco Shortening (1 1/2 cups)
1 1/2 teaspoons of vanilla extract (3 teaspoons)
3 eggs (6)

Frosting - You will need...
1/2 cup of Crisco per 1 box of Confectioner's sugar (you should really just eye-ball this, watch for the consistency you want)
4-5 tablespoons of water or milk
1 teaspoon of vanilla extract

Cupcakes
Combine the dry ingredients in a large bowl. Add the milk, Crisco, vanilla and eggs and beat until smooth. Bake at 350 degrees for 35-45 minutes. Allow to cool completely before frosting.


Frosting
Add the Crisco and confectioner's sugar to a large bowl, mix until thoroughly combined. Add milk or water and more confectioner's sugar to get to the consistency you want. Frost cupcakes and enjoy!


I know they aren't pretty, but they were good!!!
I made them first as a surprise, but I spilled the beans before long! I was too excited. We shared our cupcakes at the Tower House where we stayed for our wedding (because we're huge saps like that), and they were so great. I hope you find enjoyment in them too!

Enjoy!


With love,

Micah

4.24.2014

Cake Balls! {A Tasty, Not-Too-Naughty Treat!}

Though my heart will forever belong to cupcakes, (Sorry, Patrick) but I thought these cute cake balls would be nice Spring treats!

I have lately been obsessed with a wonderful cooking blog called Skinnytaste! Gina is the author of the blog, and she creates tasty, healthy, low-fat recipes for her family and shares them weekly! Seriously, I'm obsessed. I've been on Weight Watchers to aid me in getting back into pre-pregnancy shape (that's another post), and she creates such delicious recipes and even includes the Weight Watchers PointsPlus value! They aren't your typical diet recipes either --- the other night, P and I enjoyed homemade buffalo tenders for dinner and they were delicious and not too bad for us! Healthy comfort food? You betcha! She creates innovative recipes to make foods that are normally much worse for you (be they loaded with sugar, carbs, butter or worse!) and makes substitutions to make them healthier! 

Along with a large assortment of recipes for dinners, lunches, breakfasts, desserts, smoothies and snacks she posted this one that caught my eye...

Skinny Cake Balls!!!

We were visiting both sides of the family for Easter this year and I thought they'd be the perfect treat to bring along. So I raided my favorite craft store for supplies and got to work!!!

You Need:
16 oz Box Cake Mix, 6 oz Non-fat Plain Greek Yogurt, 2 Large Egg Whites, 1 Tsp. Vanilla, 1 Cup of Water, 48 oz of Colored Candy Melts, Sprinkles, Baking Spray

It Would Help If You Had:
Cake Ball or Mini-Donut Pan*, lollipop sticks, wax paper

Preheat the oven to 350 degrees. Spray your pan with baking spray. Combine all the ingredients (except the candy melts) in a large bowl. Transfer your batter into a pastry bag, or a gallon bag, (cut a corner off the gallon bag and BOOM! Pastry bag) and squeeze into the pans. Fill a little over 3/4 full. Bake for 18 minutes. Let cool on a wire rack. 


If you notice above there are seams on some of the cake balls, because of their rising while baking. You can use a serrated knife to cut the seams off and make them more rounded. 

Stick the completed baked cake balls in the refrigerator for at least 45 minutes, this makes it easier for the chocolate to stick to the cake ball. Melt the chocolate according the the packages' instructions. I used glass cups to hold the chocolate, and did one color at a time. I also took out five of the cake balls at a time to maximize the coolness of the cake balls! (Also, get your sprinkles ready!)


Dip the tip of the lollipop stick into the melted chocolate, then into the cake ball, and dip the cake ball into the chocolate. If you are using sprinkles, sprinkle them on immediately before the chocolate hardens.


This recipe makes about 48 cake balls AND they are at only 3 PointsPlus value from Weight Watchers --- which is a really good thing for me! They're delicious, and such a cute little treat for any occasion. 


They were a big hit at the Easter dinners! So was a certain little bunny! ;-)


*For this recipe, you really do need the rounded mini-donut or cake ball pan. If you don't have one of these you can follow this recipe from Epicurious!

Happy Spring!

Micah

2.24.2012

Cupcake Fiend

Image via Hyperbole and a Half
Yes, that's what I think of too, when I read "Cupcake Fiend." I think also that this title can also be attributed to me. I mean, I talk about them ALL THE TIME. It's an obsession, spurred from Patrick's birthday last year at which cupcakes were present. You could say we met, we wooed and the rest is history (I'm still talking about cupcakes, yes). So, in all my fiendish-ness---I want to bring you my personal favorite flavor picks! Here is my perfect half dozen flavor cupcake box (suitable for almost any palette, perfect for a party or just for a sweet treat). These cupcakes are from Kick*ss Cupcakes in Davis Square.
  • Plain Vanilla Cake with Vanilla frosting - Classic, and can be dressed up with sprinkles or food coloring. Always tasty and almost everyone will love it!
  • Plain Vanilla Cake with Chocolate frosting - If you're going to serve vanilla, there needs must be a chocolate option.
  • Red Velvet with Cream Cheese Frosting - This is becoming more and more my favorite flavor. The sweet-but-not-overwhelming frosting, the lucious red velvet-y cake! SO good. And so pretty!
Those are my classic choices, now for the funky flavors to spice things up!
  • Chocolate chip Cookie Dough with Cookie Dough filling - This is exactly as delicious as it sounds it is.
  • Pink Lemonade - It's a citrus-y summer-y piece of heaven that never fails to look adorable and taste amazing!
  • Strawberry Shortcake - So yummy, so tasty and it's healthy (kind of) because it has a strawberry on it...no? Ok.

You know you want one.

 
So those are my favorites! Oooh! I also love a good chocolate PB cup. No one can resist that. Now we just have to narrow our two bakers down and decide on flavors together! (Patrick, these options I laid down for ya, whatcha' think? Eh? Eh?)
 
Enjoy your friday and have a cupcake! Totally worth it, will make you smile.
 
Best,
 
Micah
 

12.05.2011

And More Hair Flowers!

My apologies for not posting for awhile...I've had a terrible cold and began rehearsals for A Christmas Carol  with Hanover Theatre. (Also; side note of quick news; Patrick and I both got our wedding rings in! I picked them up last week and now both of us are trying our best not to wear them around! No! I'm totally not wearing it right now as I type am wearing it right now)

Here's the tutorial I promised for the silk hair flowers (I found it here, of course on the Bee. I changed a few things but here's the gist of it)! (This one is quite a lot more simple than the Tsunami flowers). Ready? Go!

Here's what you need:
White or Colorful (fake) flowers of choice from the craft store
Needle and Thread

A button or bead for the center
Hot glue
Barrette/Alligator clip

Here's what to do: First take your faux blooms and basically take them apart. Pull the backing (usually plastic made to look like the leaves of the flower bloom) off and remove each individual set of petals.

Here's the flower as it came from the store.
Removing the bottom plastic leafy thingy.
And here are all the individual petal sets.
Then, start stacking the petals to your hearts desire to get an idea of how you want the finished flower to look. With smaller petals up top of course. Make it fluffy as a poodle on a humid day, or maybe you want a lighter hair piece, whatever looks best to you! Once you have a clear picture, you can either pin the petals together or get to sewing and gluing (I'm not the best at free-hand sewing so, I used mostly my trusty hot glue gun).
I also experimented with different fabric and
simply cut out some petals to add to the fabric flower.
Begin gluing/sewing the stacks together. For you talented sewers, pass through each petal, up one side and down the other. Since I used the glue gun, I put a bead of glue in the center, and pressed the petals firmly down onto it (Careful not to burn your fingers!).


Once your flower is glued/sewn together its time to whip out the button, needle and thread. Using a fairly sharp needle, start beneath your flower and run the thread up through the center and through the button holes to secure the button, and subsequently the flower.

Try to pull it as tightly as you can while enabling yourself
to make the passage back down through the flower.
You should end your stitching below the flower once you've finished with the button. This way, you can tie the remaining thread to your alligator clip or barrette.

Lastly, run the needle and thread a few times again through the very bottom layer of petals and the clip or barrette, until it feels quite secure. Then voila! You have a beautiful hair flower for special occasions or just-because! And how easy is that? 


This one came out significantly better.
It's my bridal hair flower trial :)
Enjoy! I'm going to keep experimenting with more hair flowers (Especially as its getting colder outside and it will be nice to settle down with some nice crafting projects and steaming mug of hot chocolate)!

Best,

Micah

11.23.2011

Give Thanks for Cupcakes!!!

Ok! Ok! I know this post doesn't directly have to do with weddings in general, but it has to do with our wedding: Cupcakes and Crafting! Tomorrow is Thanksgiving Day, a time when family gathers together to share with each other and pause to be thankful for the blessings in their lives. And to eat. A LOT (Which I am very much looking forward to, I will probably be in the gym everyday next week to pay for it too!). Patrick and I visit both our families on Thanksgiving, so we'll get two giant dinners (food-coma).

Well, being the Cupcake-Freak that I am, I decided that these little guys would be perfect for my contribution to Thanksgiving...get ready: 

Butterbeer Cupcakes. 

(I KNOW!) I found the recipe through an adorable blog called The Pastry Affair and I was instantly smitten. I love Harry Potter as much as the next gal, so this recipe became a shining achievement for me when I was done; much like catching the Golden Snitch (I'm a nerd)!
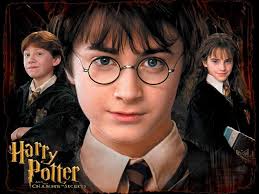
Harry Potter + Cupcakes = Magic Delicious
The recipe was fairly simple to make. Here it is!
(Taken from The Pastry Affair; the [blue] will be my commentary)

Butterbeer Cupcakes
Adapted from Amy Bites Yields 18 cupcakes
Butterbeer Cupcakes
2 cups flour
1 1/2 teaspoons baking powder
1/2 teaspoon baking soda
Pinch of salt
1/2 cup (1 stick) unsalted butter, softened
1 cup dark brown sugar, packed
3 large eggs
2 teaspoons vanilla extract
1 teaspoon butter flavoring
1/2 cup buttermilk
1/2 cup cream soda
Preheat oven to 350 degrees F (175 degrees C). Line a cupcake tin with baking cups.
In a medium bowl, whisk together the flour, baking powder, baking soda, and salt. Set aside. In a large mixing bowl, beat together the butter and brown sugar until light and fluffy. Add the eggs one at a time, beating well after each addition. Beat in the vanilla extract and butter flavoring.[I then added a sprinkling of Crushed Cloves, for that perfect Autumn-y taste/smell. Totally optional, of course!!!]

Whipping up the cakes!
Using my best friends' wedding favor Vanilla extract
as an ingredient makes it made with love!!!
Cupcake batter
Fold in 1/3 of the flour mixture, then the buttermilk, 1/3 of the flour mixture, cream soda, and then the remaining flour. Folding in these ingredients will prevent over-mixing and will result in a fluffier, less dense cupcake. Fill cupcake liners 3/4 of the way full and bake for 15-18 minutes [I only did about 16 minutes and they were perfect], or until the cupcakes are golden and spring back when touched. Cool completely before frosting.[Definitely allow at least 20 minutes to cool, otherwise the next steps will be more challenging]
Using the Teacup Cupcake holders
Delicious!

Butterscotch Ganache
11 ounces (1 package) butterscotch chips
1 cup heavy cream
In a small saucepan on medium heat, melt the butterscotch chips into the heavy cream, stirring until smooth. Remove from heat and cool to room temperature before using.
Butterscotch Buttercream
6 tablespoons unsalted butter, softened
1/4 cup butterscotch ganache (recipe above)
1 teaspoon vanilla
1 teaspoon butter flavoring
Pinch of salt
3-3 1/2 cups powdered sugar
Splash of heavy cream (as needed)
In a large mixing bowl, beat the butter until light and fluffy. Mix in the butterscotch ganache, vanilla, butter flavoring, and salt. Beat in the powdered sugar for 2-3 minutes, starting with 3 cups and adding more only if necessary. Add the cream a tablespoon at a time until desired consistency is achieved (I only needed 1 tablespoon).
To Assemble
Pour butterscotch ganache into a plastic squeeze bottle. Stab the tip of the bottle into cupcake and fill each cupcake with butterscotch ganache until it starts to overflow.[I used a turkey baster to create a hole, and then filled it with the ganache]
Fill a pastry bag with butterscotch buttercream and pipe onto the top of each cupcake [Now, as you can see, I had a lot of trouble, so I went home-style and just slathered the frosting on, but if you are clever, go for the piping!] . Drizzle on the butterscotch ganache. Lick your fingers clean if you just so happen to get extra butterscotch on them. If you have any leftover butterscotch ganache, it can be used as ice cream topping. [Or like me, you can add more clove powder and some cinnamon sugar to the top! Yummers!]
Store in an airtight container at room temperature 
Voila! Beautiful butterbeer cupcake!!! 
I LOVED the way that they displayed the cupcakes from The Pastry Affair pictures, so I decided to make some adorable signs as well. It was super easy, but I think it added a really nice touch! I took some orange card stock  and my awesome oval stamp (from Michael's) and punched out a bunch of ovals.

I wrote some cute little messages like "Yum," "Enjoy," and "Happy Thanksgiving" on them with a calligraphy pen. And then simply taped them to a toothpick.
Easy-peasy!


I stuck them in the cupcakes and BOOM, BAM! Done.


Took all my strength not to eat one.
So there's my Thanksgiving Cupcake love song! It was super easy and since the little signs look so cute I think I might make some for our wedding cupcakes! Maybe with Patrick's and my *s!!! I'll keep you updated!

Enjoy the recipe! There are tons of other adorable, scrumptious-looking recipes on The Pastry Affair, so check it out!

Best,

Micah